First, cut your pieces.
These are the parts for the three small accessory pockets on the inside cover; the rest of the demonstration will be of the single large pocket on the back cover, because larger is more clear, and I forgot to take photos of the parts for that before I started sewing.
Things to notice: the pink vinyl is cut to its final shape and size. The clear vinyl is cut a little larger, and the white backing material is cut significantly longer (and a little wider).
The inside of the binder will be covered with a vinyl-backed nylon taffeta, which is nice and smooth, pretty thin while still being sturdy, and I happen to have a lot of scraps of it. When I did my sample on just the nylon taffeta, the fabric buckled unevenly under the pocket, so I decided I needed to back it with a sturdy interfacing. Also when I did my sample, I found it very difficult to line up exactly where it needed to go. To solve both problems, I traced the outline of the pocket on the interfacing (upside down), and used that as a stitching guide to sew the two pieces together. Now I can easily see on the front where the pocket needs to be placed, and the two pieces are securely bound together.
 |
| black on black on black. Hard to photograph. Sorry. |
Next, I stitched the pink and clear vinyl pieces (pink on the outside) to the zipper. They're lined up on the top and right-hand sides in this photo, the clear vinyl is larger and sticks out on the left and bottom.
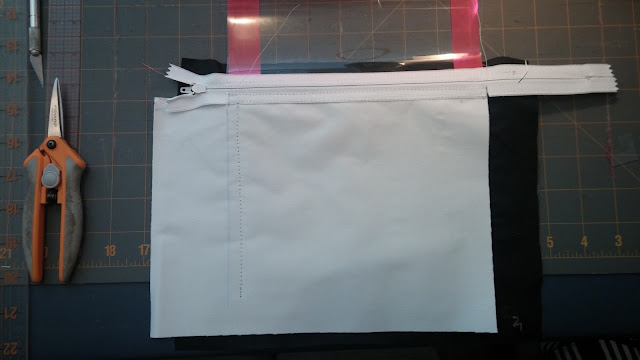
Then, using my stitched line from the first step, I sew the zipper to the taffeta, only exactly as long as the pink vinyl panel.
 |
| I changed to white thread, so you can't see the stitching. |
I cut off (and fray-checked!) the ends of the zipper, and move the zipper pull toward the center, so I could sew the left-hand edges of the three layers together: pink, clear and white. If you do this, don't forget to secure the cut-off ends of your zippers by sewing over them several times to create thread stops. Otherwise you'll zip your zipper pull right off the end, and there will be tears.
This process took both hands, so I only have a photo of the finished result. You can see how the excess white fabric makes a nice pleat under the left-hand edge of the vinyl.
Using binder clips to keep everything under control, I lined up the pink vinyl with the stitched boundaries on the black taffeta.
...And stitched down the two free sides.
Last step was to take my sharpest, slimmest scissors and cut off the excess clear and white layers, following the pink edges. And that's how I made a zippered captchalogue card pouch, to be set into a binder.
Now to do it three more times, and smaller!


No comments:
Post a Comment